Citrix NetScaler 11.1 High Availability
- David Hammett
- Oct 18, 2016
- 2 min read
Citrix NetScaler supports active-passive failover allowing the secondary appliance to take over, without loss of service, from the primary in the event it goes down. The following article goes through the steps of setting the nsroot password, configuring high availability and securing communication between the appliances for better security.

Log on to the NetScaler web management console. The default username and password is nsroot and nsroot.

To change the default password for nsroot expand System > User Administration, click Users, select the checkbox for nsroot and click Change Password.

Enter a new password and click OK. Repeat these steps on the second appliance to keep the nsroot passwords the same.

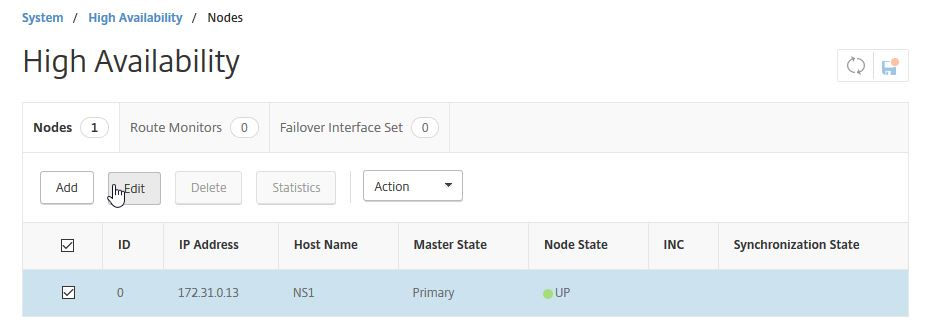
Expand System and click High Availability.

Select the only entry in the list and click Edit or just click on the entry.

Change High Availability Status from ENABLED to STAYPRIMARY. This is to make sure that when the second appliance is added into the high availability pair it will see this appliance as primary and will synchronise it's configuration overwriting any settings on the secondary one.

Scroll down to the bottom of the page and click OK.

The Node State should now show STAYPRIMARY. Click on Add.

Enter the second appliance's NetScaler IP (NSIP) address in Remote Node IP Address and enter the nsroot and password in User Name and Password fields. Click Create once done.

When the appliance is first added it will show IN PROGRESS in the Synchronization State. Keep clicking the refresh button until it shows SUCCESS.

Optionally you can configure the RPC Nodes to secure the communication between the appliances. By default they use a default password and unencrypted traffic for high availability communication.

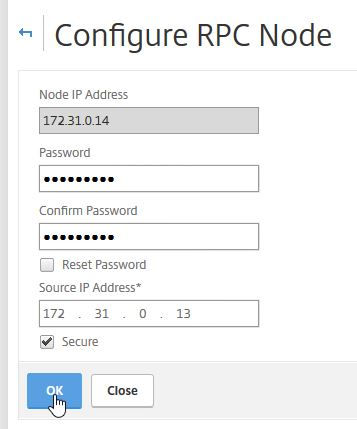
Expand System > Network and click RPC. Click on the first entry in the list to edit it.

Enter a new password, select Secure and click OK.

Repeat this step for the second entry in the list. The changes will be sychronised with the secondary appliance automatically.

Go back to High Availability and click on the first entry in the list to edit it.

Change High Availability Status back to ENABLED.

Scroll down to the bottom of the page and click OK.

Click on the disk icon to save the configuration.

Click Yes.

If you log on to the second appliance and look in High Availability it should show itself as the secondary and the other appliance as primary.


