
Citrix XenApp/XenDesktop 7.9 Director Install
Citrix Director is a component of XenApp/XenDesktop and is used to manage and monitor user sessions via a web browser. This article goes through the steps of installing Director 7.9 on a server and optionally configuring SSL for use with it.

Insert the Citrix XenApp/XenDesktop 7.9 installation media. Once the autorun program starts click Start for either XenApp or XenDesktop.

Click Citrix Director under the Extend Deployment section.

Accept the license agreement and click Next.

Click Next.

Enter the FQDN for one of the Delivery Controllers in Controller address and click Test connection.
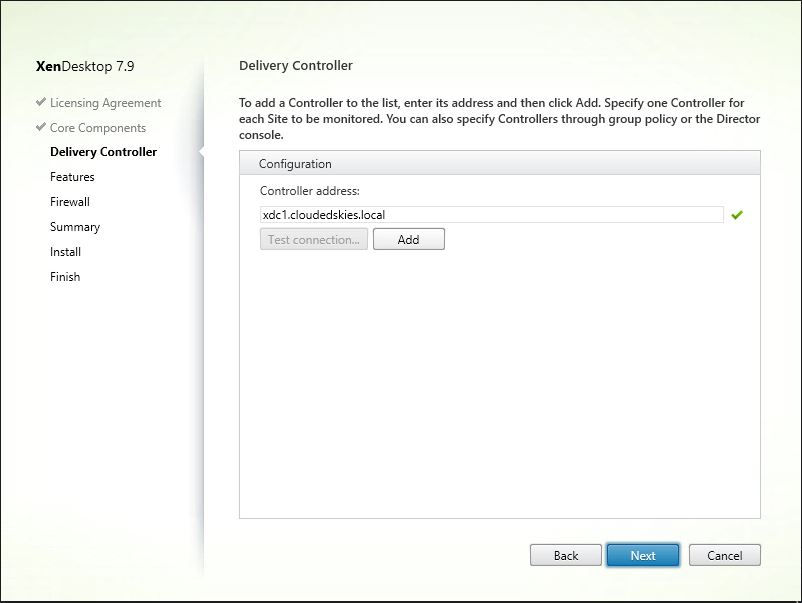
Click Add.

Click Next.

Windows Remote Assistance is used to shadow user sessions on VDI desktops and XenApp session servers. Leave Install Windows Remote Assistance selected and click Next.

Click Next.

Click Install.

Once installation is complete and click Finish.

You should be able to launch a web browser and connect to Director via http.

Optionally to configure SSL on the Director server, open MMC and click File > Add/Remove Snap-in...

Select the Certificates MMC snap-in and click Add.

Select Computer account and click Next.

Leave Local computer selected and click Finish.

Click OK.

Expand Certificates (Local Computer) > Personal > Certificates, right click on Certificates and click All Tasks > Request New Certificate...

Click Next.

Click Next.

Select the certificate template from the list, expand Details and click Properties.

Under the Subject name section, select Common name in the Type drop-down box, enter the FQDN of the server in Value and click Add.

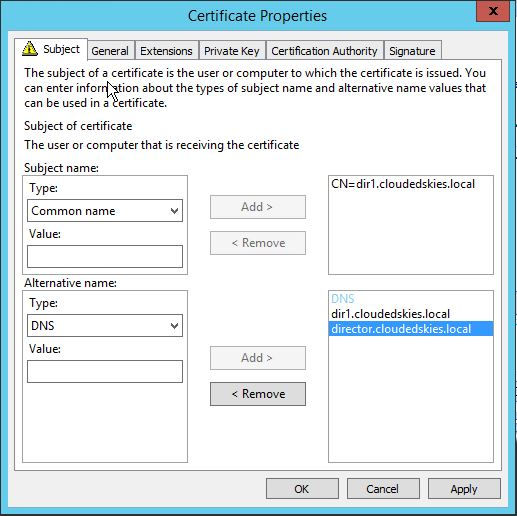
In the Alternative name section, select DNS in the Type drop-down box, enter the FQDN of the server and click Next.
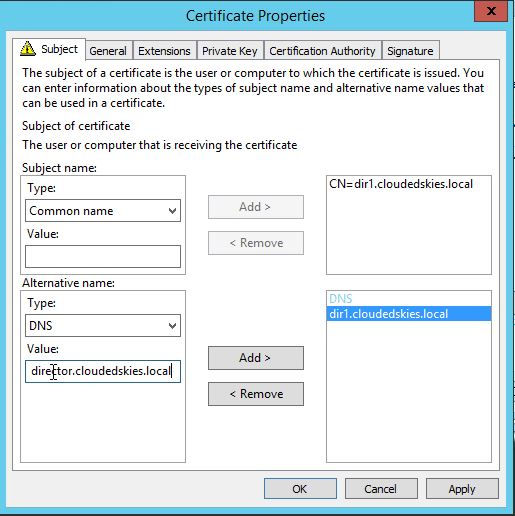
Repeat this step for the load balance FQDN for Director.
Optionally click on General tab.

Enter Friendly name and click OK.

Click Enroll.

Click Finish.

The certificate should have been successfully created; close MMC.

Open Internet Information Services (IIS) Manager.

Click No.

Expand the server, Sites, select Default Web Site and click Bindings.

Click Add.

In Type select https, in SSL certificate select the certificate created earlier and click OK.

Click Close.

Open a web browser and go to the Director URL i.e. https://<Director FQDN>/Director. You should be able to successfully get to the Director logon page via https.


