Citrix Provisioning Services 7.9 Target Device Install
Citrix Provisioning Services Target Device software allows an operating system like Windows to network boot from a standard image shared between multiple virtual or physical machines. The following article goes through the steps of preparing a Windows 10 x64 virtual machine to network boot from Provisioning Services including installing Provisioning Services Target Device software, using the Imaging Wizard to create a vDisk, optimize the vDisk, configuring Provisioning Services to allow multiple VM's to boot from the same image and load balance between multiple servers.
Insert the the Citrix Provisioning Services 7.9 media.

Click on Target Device Installation.

Click Target Device Installation.

Click Next.

Accept the license agreement and click Next.

Click Next.

Change the installation path or leave as is and click Next.

Click Install.

Click Finish.

The Imaging Wizard will launch; click Next.

Enter the Provisioning Server hostname, FQDN or IP address in Server name or IP, provide the PVS admin user credentials or leave Use my Windows credentials selected and click Next.

We want to create a vDisk on the Provisioning Server itself, so leave Create a vDisk selected and click Next.

Enter the Target device name that will be used as the Windows hostname for this master image when it has been copied to Provisioning Services. It cannot be the same as the current Windows master image hostname as Provisioning Services needs to control the Active Directory computer account. If the VM had mutliple vNIC's attached Network connection would need to specify the vNIC used for booting the VM up over the network. In this case there is only one NIC. The Collection name is a group that contains the target device. Click Next.

Enter vDisk name to identify the vDisk that is about to be created on Provisioning Services; make it descriptive so people know what it is for. Select Store name from the list, which specifies where the vDisk will be created; there is only one store in this case. Leave vDisk type on Dynamic, so the vDisk only uses the minimum of disk space. Fixed allocates the entire disk space in one go, so a 60GB vDisk would take up 60GB of disk space on Provisioning Services. The latest VHD format is VHDX, so leave this selected and click Next.

Leave None selected when first creating the vDisk image. We will be setting the Key Management Service (KMS) licensing on the vDisk later. Click Next.

We want to image the entire disk, so select Image entire boot disk and click Next.

Select Optimize the hard disk again for Provisioning Services before imaging and click Edit Optimization Settings...

Deselect Reduce Event Log Size to 64KB to keep the default size for the Event Logs and click OK.

Click Next.

Click Create.

Click Continue.

Before clicking on Yes, make sure the VM will boot from the NIC.

On VMware vSphere you can click Edit Settings for the VM.

If the VM virtual hardware version is greater then 8 you will get this message, if you attempt to modify the virtual hardware using vSphere Client. Just click OK to continue.

Click the Options tab.

Select Advanced > Boot Options, click The next time the virtual machine boots, force entry into the BIOS setup screen and click OK.

Click Yes.

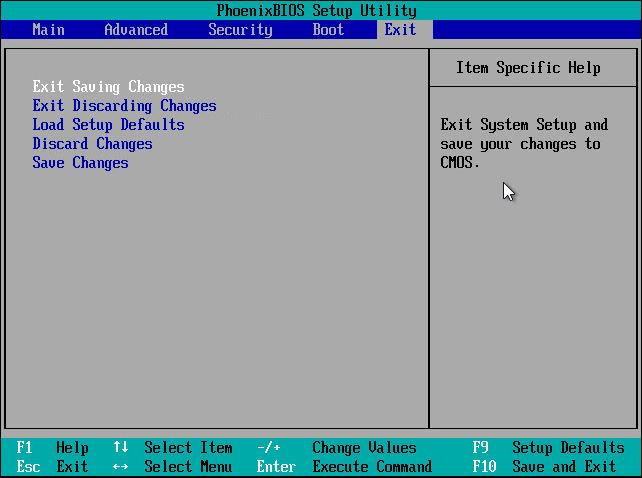
When the VM boots up it will go straight into the BIOS set-up screen. Select the Boot menu from the list.

Move the NIC to the top of the list of bootable devices.

Select the Exit menu.

Select Exit Saving Changes.

Select Yes.

The VM will PXE boot up into Windows 10 from Provisioning Services. Once it has loaded up log on to Windows and the Imaging Wizard will start-up and begin the imaging process.

Once done click Log to review the imaging process.

Click View Full Log File and/or click Close.

Click Done and shutdown the VM.

Log on to Provisioning Server and launch Provisioning Services Console.

Right click on Provisioning Services Console and click Connect to Farm...

Enter the Provisioning Server hostname, FQDN or IP address in Name, leave Port as is, provide the PVS admin user credentials and click Connect.

Expand farm name > Sites > site name > Device Collections and click on the collection name. Double click on the target device name created using the Imaging Wizard.

Select vDisk from the Boot from drop-down box and click OK.

Power up the master image again, install any patches, applications etc. Once complete the vDisk needs to be prepared for Windows KMS licensing, so launch the Command Prompt.

In the Command Prompt run slmgr /dlv to view the type of Windows license currently configured on Windows.

VOLUME_KMSCLIENT should be displayed in the Description field otherwise the KMS client license key must be added to Windows using slmgr before proceeding. Click OK.

Run slmgr /rearm to rearm Windows.

Click OK and shutdown Windows.

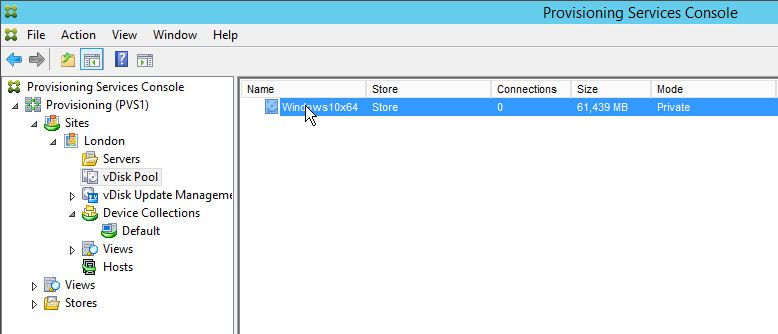
Go back on the Provisioning Services Console on the Provisioning Server, go to vDisk Pool under the site name and double click on the vDisk.

Select Standard Image (multi-device, read-only access) from the Access Mode drop-down list. Cache type should have Cache in device RAM with overflow on hard disk to utilise the VM's memory for disk caching and overflow to the locally attached virtual disk for best disk IOPS performance. Enter the amount of VM memory to use for the disk cache in Maximum RAM size (MBs) and click Microsoft Volume Licensing tab.

Select Key Management Services (KMS) to configure the vDisk to use Microsoft KMS licensing for Windows.

Locate the vDisk in Windows Explorer, select both the PVP and VHDX files, right click and click Copy.

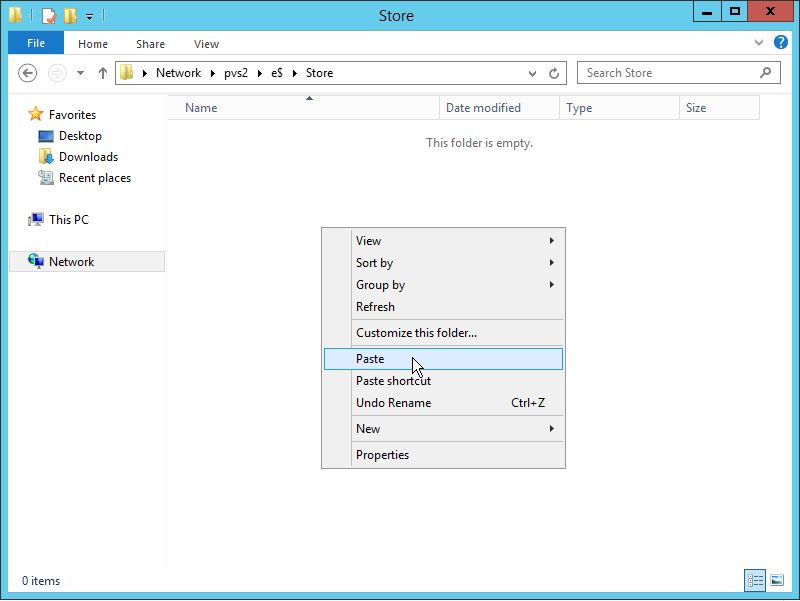
Locate the storage used by the second Provisioning Server and Paste the vDisk files to copy them to the second server.

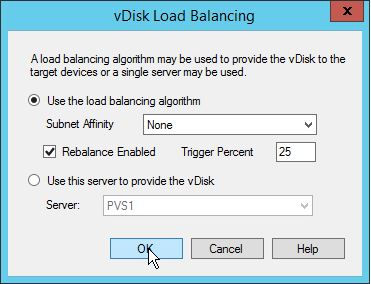
Once the files have been copied to the second server, go into Provisioning Services Console, right click on the vDisk and click Load Balancing...

Select Use the load balancing algorithm, select Rebalance Enabled and click OK.
The vDisk is now ready for multiple devices to boot from the image and they will be load balanced across both Provisioning Servers.


