Citrix XenApp/XenDesktop 7.8 Creating an AppDisk with Provisioning Services
Citrix XenApp/XenDesktop 7.8 introduced AppDisks allowing applications to be managed separately from the underlining operating system. AppDisks are virtual disks that store all the application registry settings and files separately from the operating system. AppDisks are added to the virtual machine, XenApp/XenDesktop merges the operating system and the AppDisk virtual disks to provide an image with both the operating system and the applications. The AppDisk can be removed from the virtual machines and all the applications associated with the AppDisk will disappear from the virtual machine.
At the time of writing this article AppDisks are only supported on Citrix XenServer and VMware vSphere; Hyper-V is not currently supported.
To create an AppDisk open Citrix Studio on the XenApp/XenDesktop Delivery Controller or on a desktop computer go to AppDisks in the navigation tree.
Preparing VMware vSphere for AppDisks
The first step is to prepare the hypervisor for AppDisks to make sure the XenDesktop service account configured under Hosting has the correct permissions to add and modify virtual machines. The following are the instructions for preparing VMware vSphere in this case version 6.0 Update 2.

Log on to the VMware vSphere Web Client using an administrator account that can modify Roles.

Click on Administration.

Click on Roles and select the role used by the XenDesktop service account configured under Hosting (in this case the role created previously is XenDesktop.) Make sure XenDesktop is selected and click on the pen icon.
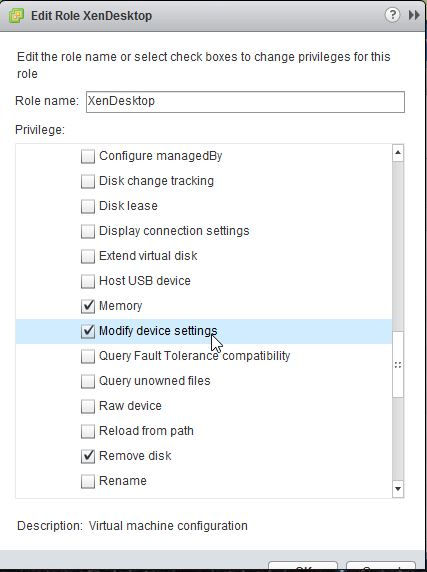
Select Modify device settings under All Privileges > Virtual machine > Configuration and click OK.
Create an AppDisk
Open Citrix Studio on the Delivery Controller or on a desktop with it installed.

In order to create an AppDisk you need a virtual machine that is available in a compatible machine catalog and is not assigned to a delivery group. In this case I am going to remove an existing machine from a Delivery group. Double click on the Machine Catalog to list the virtual machines assigned to it.
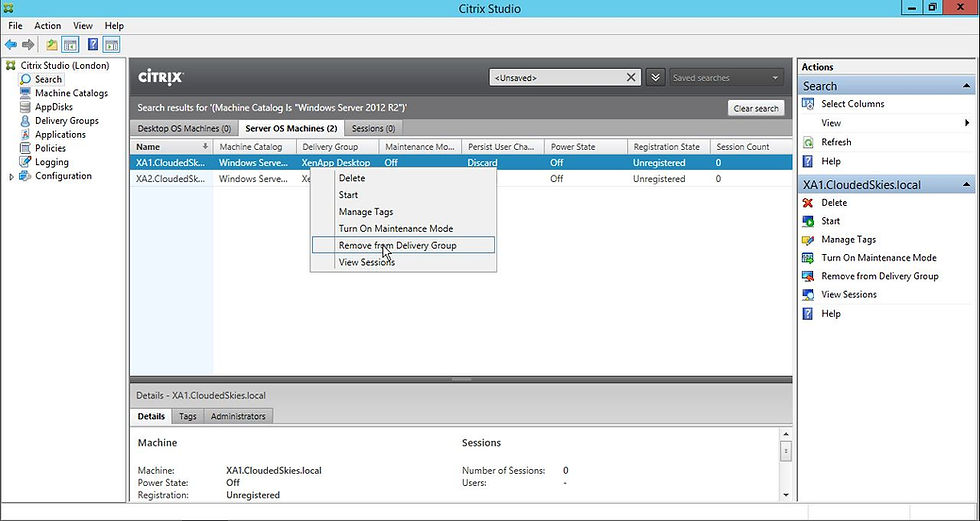
Right click the virtual machine and select Remove from Delivery Group making sure it has no users on it first!

Click Yes.
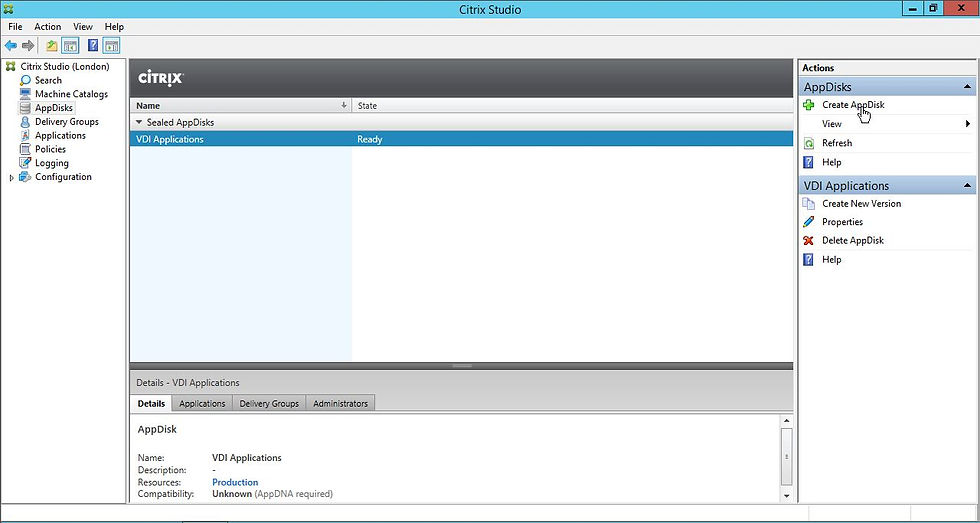
Click AppDisks in the navigation tree on the left and click Create AppDisk.

Click Next.

By default Create new vDisk is selected, under Disk size select 3GB (small), 20GB (Medium), 100GB (Large) or alternatively select Custom and enter the disk size you want and click Next.

Select the machine catalog from the list that has an available virtual machine and click Next.

Enter the AppDisk name and optionally the Description and click Finish.

Preparing Provisioning Services to Update the AppDisk
The machine catalog has been created using Citrix Provisioning Services so the target device and vDisk need to be prepared on Provisioning Services ready for the AppDisk to be created. Log on to the Provisioning Server and open Provisioning Services Console.
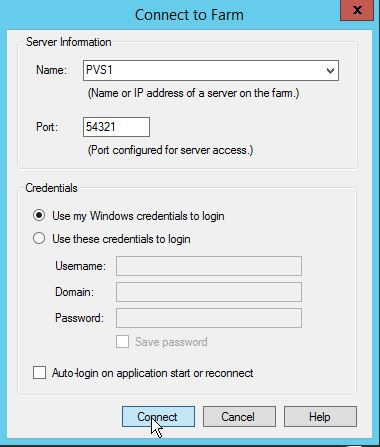
Enter the server name or IP address in Name and either leave Use my Windows credentials to login or Use these credentials to login and enter the login details in Username, Domain and Password; click Connect to continue.
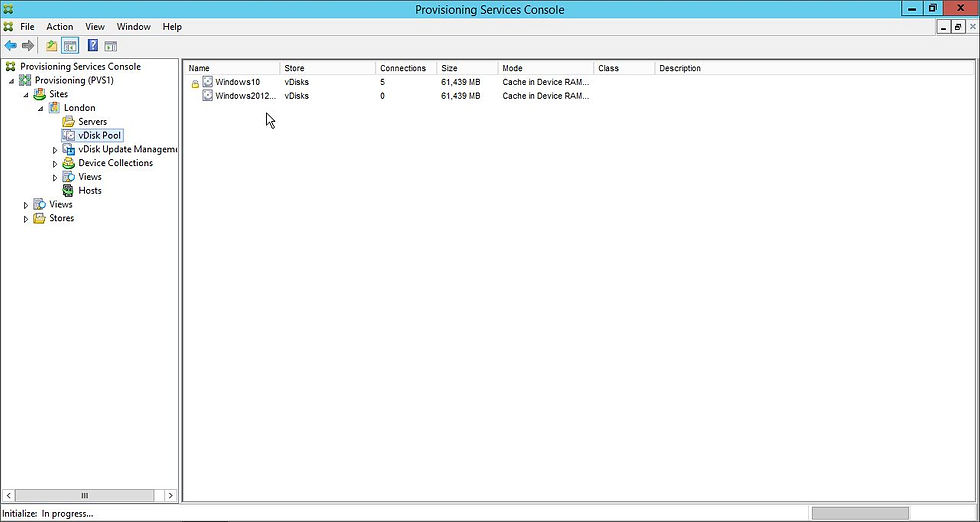
Expand farm name, Sites, site name and click vDisk Pool.

Right click on the vDisk in the list and click Versions...

Click New.
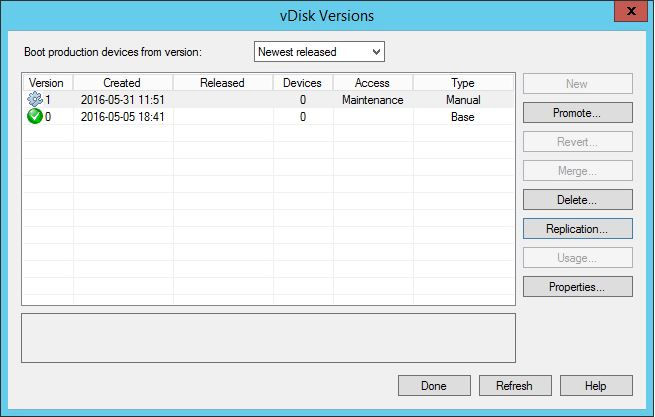
Click Done.
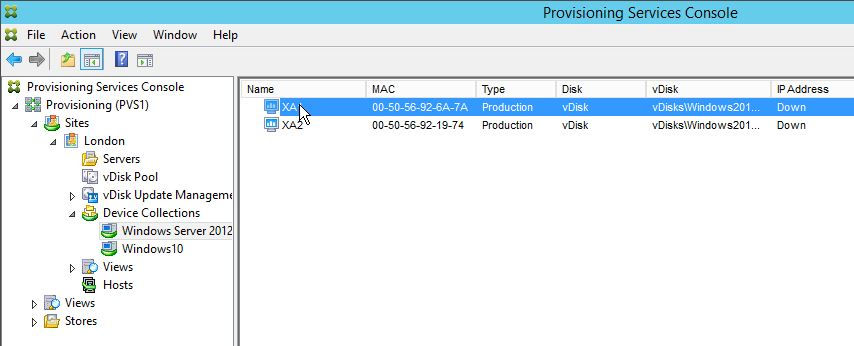
Expand Device Collections, click on the device collection name containing the target device that will be used to update the AppDisk and double click the target device.

Click on the Type drop-down box, select Maintenance and click OK.
Continue AppDisk Creation

Go back to Citrix Studio and click OK to continue the AppDisk creation process.

It may take a while for it to create the AppDisk, the selected virtual machine will be rebooted several times.
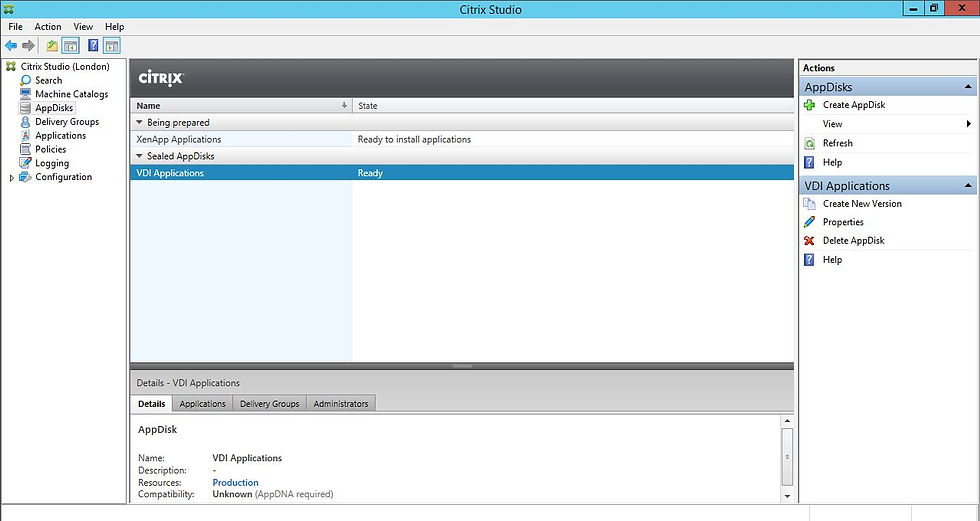
The virtual machine should be up and ready for you to install the applications. Once done you can proceed to the next step, which is to seal the AppDisk.
Seal AppDisk Ready for Deployment
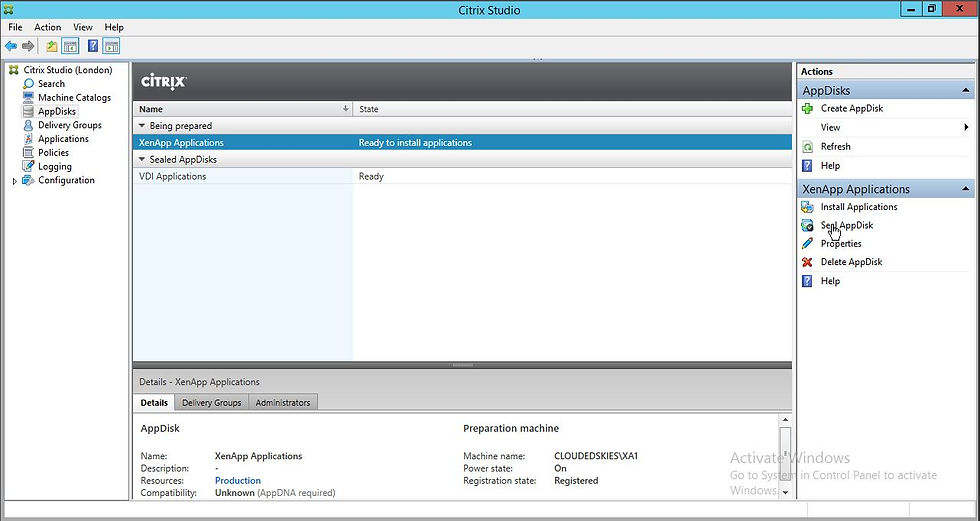
Select the AppDisk from the list and click Seal AppDisk.

Click Yes.
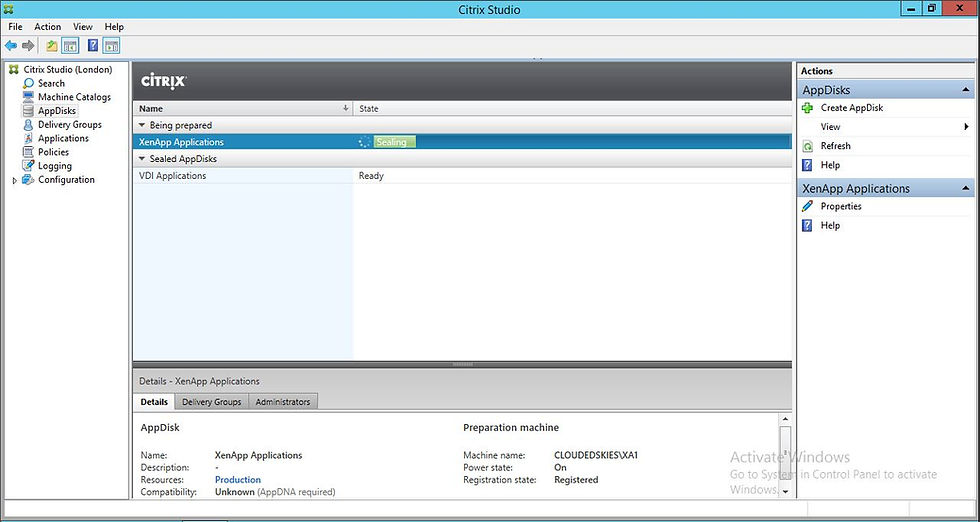
It may take a while for the process to complete and the virtual machine will reboot multiple times.
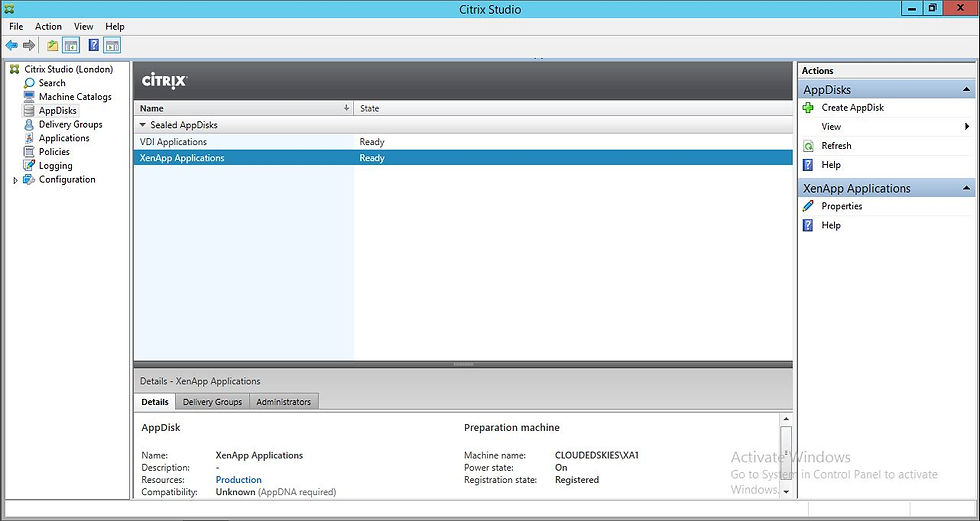
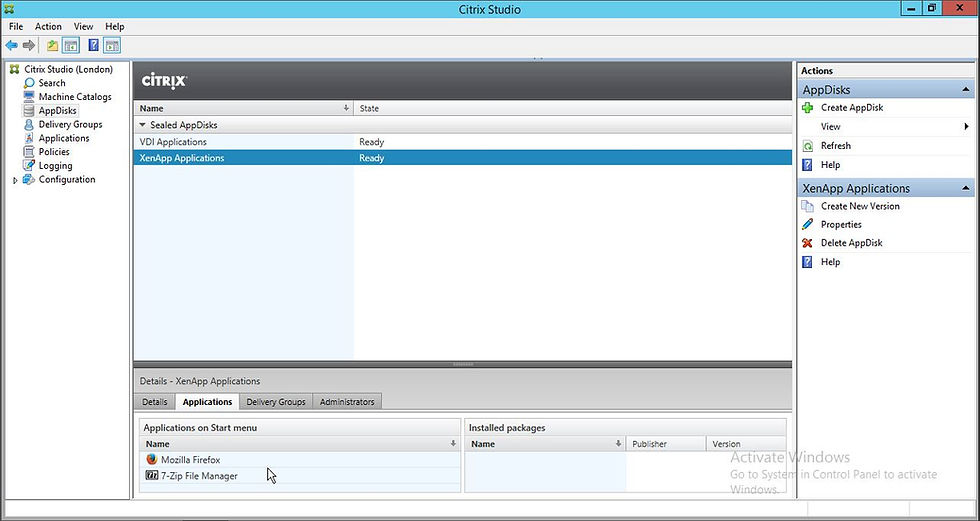
You should be able to see the applications that have been installed on to the AppDisk under the Applications tab.
Clean-up Provisioning Services Target Device and vDisk Settings
Now the AppDisk has been sealed Provisioning Services can been cleaned up to remove the changes made earlier as they are no longer required. Go back to the Provisioning Services Console on the Provisioning Server.

Double click on the target device in the device collection to open its properties.

Select Production from the Type drop-down box and click OK.
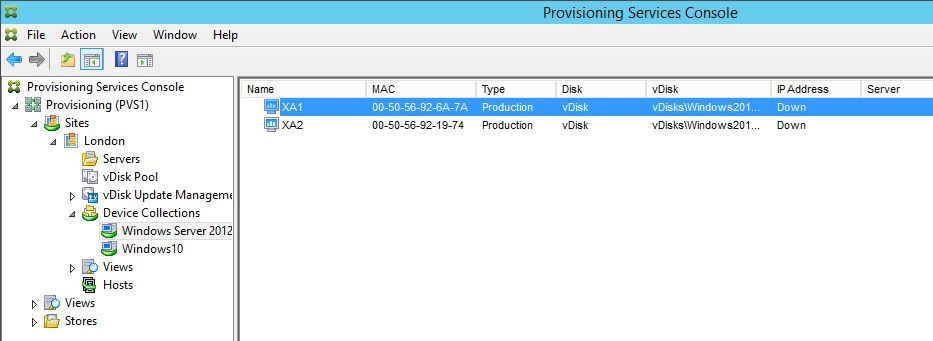
Select vDisk Pool in the navigation tree.

Select the vDisk, right click on it and click Versions...

Select the Maintenance version from the list, normally it will be the one with the highest version number and click Delete.
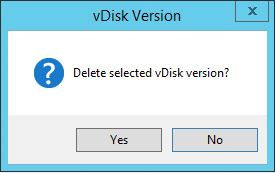
Click Yes.

Click Done.

Deploy AppDisk to Delivery Group
Go back to Citrix Studio, add the virtual machine back into the Delivery Group and assign the AppDisk to the Delivery Group.

Click on Delivery Groups in the navigation tree, select the Delivery Group, right click and select Add Machines.

Select the machine catalog from the list, enter the number of machines in Choose the number of machines for this Delivery Group and click Next.

Click Finish.

Select the Delivery Group from the list and click Manage AppDisks.

Click Add...

Select one or more AppDisks from the list and click OK.
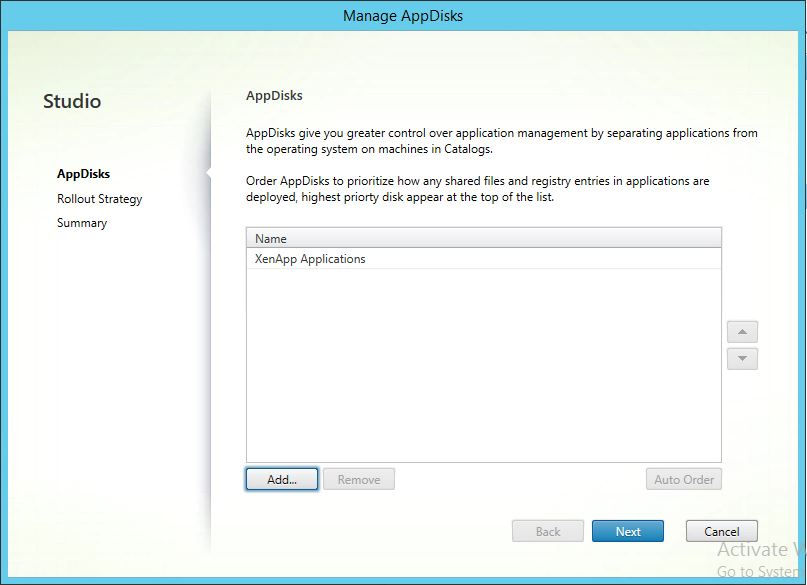
Click Next.
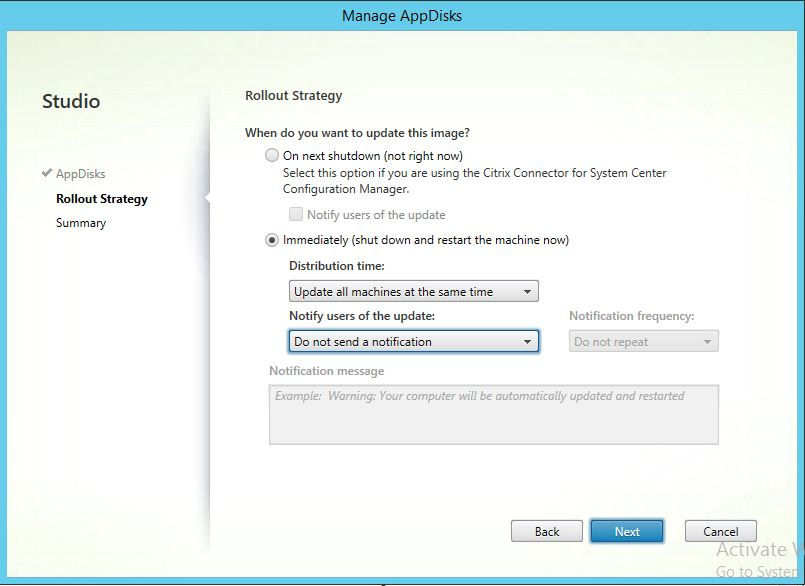
Select On next shutdown (not right now), if you have System Center Configuration Manager, alternatively select Immediately (shutdown and restart the machine now). Select Update all machines at the same time from the Distribution time drop-down box. Select Do not send a notification, 1 minute before user is logged off, 5 minutes before user is logged off or 15 minutes before user is logged off in the Notify users of the update drop-down box. If Do not send a notification is not selected you can enter a custom message in Notification message that will be sent to the users.

Click Finish.

The virtual machines in the Delivery Group when booted up should contain all the applications that were installed on the AppDisk.


